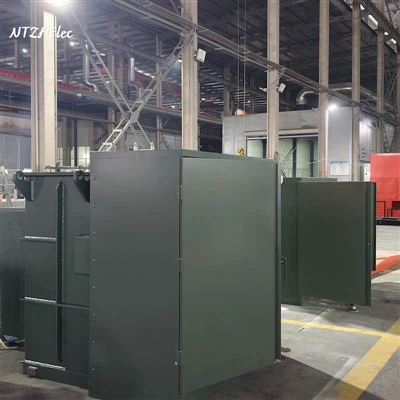
Repairing an oil-leaking transformer oil tank is a crucial task that requires a systematic approach and a good understanding of the equipment. As a transformer oil tank supplier, I have witnessed firsthand the importance of proper maintenance and repair to ensure the safe and efficient operation of transformers. In this blog post, I will guide you through the process of repairing an oil-leaking transformer oil tank.
Step 1: Safety First
Before starting any repair work on a transformer oil tank, safety should be your top priority. Transformers contain high-voltage components and flammable oil, so it is essential to follow all safety protocols. First, ensure that the transformer is completely de-energized. This may involve shutting down the power supply at the main switchboard and using appropriate lockout/tagout procedures to prevent accidental re-energization.
Wear personal protective equipment (PPE) such as safety glasses, gloves, and a fire-resistant suit. Have a fire extinguisher nearby in case of an emergency. Additionally, make sure the area around the transformer is well-ventilated to prevent the accumulation of oil vapors.
Step 2: Identify the Leak
Once safety measures are in place, the next step is to identify the source of the oil leak. There are several common areas where leaks can occur in a transformer oil tank. These include welds, gaskets, seals, and fittings.
Inspect the exterior of the tank carefully. Look for signs of oil stains, drips, or puddles. You may also notice a hissing sound if the leak is due to a pressure difference. If the leak is not obvious on the outside, you may need to use a dye penetrant test or an ultrasonic leak detector to locate the source.

Step 3: Drain the Oil
Before making any repairs to the oil tank, it is necessary to drain the oil. This can be a time-consuming process, but it is essential to prevent oil from interfering with the repair work.
First, locate the oil drain valve on the transformer tank. Place a suitable container beneath the valve to collect the oil. Open the valve slowly and allow the oil to drain completely. Be careful not to spill the oil, as it can be hazardous to the environment.
Once the oil is drained, you may need to clean the inside of the tank using a suitable solvent to remove any remaining oil or debris. This will help ensure a proper seal when the tank is repaired.
Step 4: Prepare the Repair Area
After draining the oil, prepare the area around the leak for repair. If the leak is at a weld, use a grinder or a wire brush to remove any rust, paint, or debris from the weld area. This will help the new weld to bond properly.
If the leak is due to a faulty gasket or seal, remove the old gasket or seal carefully. Clean the mating surfaces thoroughly to ensure a smooth and clean surface for the new gasket or seal.
Step 5: Welding Repairs
If the leak is at a weld, welding repairs may be necessary. Welding should only be performed by a qualified welder who is experienced in working with transformer oil tanks.
Before welding, make sure the tank is properly grounded to prevent electrical shocks. Use the appropriate welding technique and filler material for the type of steel used in the tank. Follow all welding safety procedures, including wearing a welding helmet, gloves, and other protective equipment.
After welding, inspect the weld for any defects such as cracks or porosity. Use a non-destructive testing method such as ultrasonic testing or dye penetrant testing to ensure the integrity of the weld.


Step 6: Gasket and Seal Replacement
If the leak is due to a faulty gasket or seal, replace it with a new one. Make sure to select the correct gasket or seal material for the application. Common gasket materials for transformer oil tanks include rubber, neoprene, and silicone.
When installing the new gasket or seal, apply a thin layer of gasket sealant to the mating surfaces. This will help create a better seal and prevent future leaks. Make sure the gasket or seal is properly seated and tightened according to the manufacturer's specifications.
Step 7: Pressure Testing
Once the repairs are completed, it is important to perform a pressure test to ensure the integrity of the tank. A pressure test involves filling the tank with oil and applying a specified pressure to check for any leaks.
Connect a pressure gauge to the tank and slowly fill the tank with oil. Once the tank is filled, increase the pressure to the recommended level and hold it for a specified period of time. Monitor the pressure gauge and inspect the tank for any signs of leaks.
If no leaks are detected during the pressure test, the tank is considered to be repaired successfully. However, if leaks are found, repeat the repair process until the tank is leak-free.
Step 8: Refill the Oil
After the pressure test is successful, refill the transformer oil tank with the appropriate type and amount of oil. Make sure to follow the manufacturer's recommendations for oil filling.
Use a filtration system to remove any impurities from the oil before filling it into the tank. This will help ensure the proper operation of the transformer and prevent any damage to the internal components.
Step 9: Final Inspection
Once the oil is refilled, perform a final inspection of the transformer oil tank. Check for any signs of leaks, loose fittings, or other issues. Make sure all electrical connections are tight and secure.
Test the transformer to ensure it is operating properly. Monitor the temperature, oil level, and other parameters to ensure the transformer is functioning within the normal range.

Types of Transformer Oil Tanks
As a transformer oil tank supplier, we offer a wide range of transformer oil tanks to meet the diverse needs of our customers. Some of our popular products include:
- Three Phase Pad Mounted Transformer Oil Tank: These tanks are designed for three-phase pad-mounted transformers and are suitable for use in urban and suburban areas.
- Standard Corrugated Tank: The corrugated design of these tanks provides increased strength and durability, making them ideal for outdoor applications.
- Single Phase Pad Mounted Transformer Oil Tank: These tanks are specifically designed for single-phase pad-mounted transformers.
- Single Phase Pole Mounted Transformer Oil Tank: Ideal for pole-mounted single-phase transformers, these tanks are lightweight and easy to install.
- 35 - 69KV Power Transformer Oil Tank: Designed for high-voltage power transformers, these tanks are built to withstand the rigors of heavy-duty use.
Contact for Procurement
If you are in need of a high-quality transformer oil tank or have any questions about our products and repair services, we encourage you to reach out to us. Our team of experts is ready to assist you in finding the right solution for your transformer needs. We look forward to the opportunity to work with you and provide you with the best possible products and services.
References
- Electrical Safety Codes and Standards (Local and International)
- Transformer Manufacturer's Manuals
- Welding Handbook for Pressure Vessels and Tanks